
Environment Setup
You may use any Java™ development environment you wish to develop extensions for MotiveWave™. This section will explain how to get up and running with the Eclipse Integrated Development Environment (IDE). We have also included a sample Eclipse Project that you may use as a starting point for your own development. This sample project contains a build script (Apache ANT based) that makes it easy to deploy your changes to MotiveWave™ and package your extensions for distribution.
Eclipse (www.eclipse.org) is the most popular tool for Java development and best of all its free! There are many different environments for Java development, some of the more notable tools include:
NetBeans – This Open Source development environment is free as well and is developed by Sun (now Oracle)
IntelliJ – http://www.jetbrains.com/idea
JCreator – http://www.jcreator.com
Where do I get the SDK?
The SDK (Software Development Kit) is built directly into MotiveWave™, but if you want to download the mwave_sdk.jar, java doc and sample project you can get it from here: https://motivewave.com/sdk.htm
Installing Java
If you have not done so already, you will need to download and install the Java Development Kit (JDK). Please note: this is different than the Java Runtime Environment (JRE) as it contains development tools such as the Java compiler (javac).
Version 5 of MotiveWave™ supports Java 1.8.0_121 and higher. If you are using an older version of MotiveWave, you should check the installed Java version by choosing Help -> About from the console menu bar.
The Java Development Kit can be downloaded here: http://www.oracle.com/technetwork/java/javase/downloads/index.html
Installing Eclipse
Eclipse comes in many different versions (and flavors). For our purposes we just need basic Java functionality so we will download ‘Eclipse IDE of Java Developers’. This can be found at the following website: http://www.eclipse.org/downloads/
There are many different tutorials and books available to help you get started with Eclipse. If you don’t want to search the internet, you can start here: http://www.eclipse.org/resources/?category=Tutorial
Here is a link to an introduction of the Java IDE: http://www.eclipse.org/resources/resource.php?id=505
Creating a Project
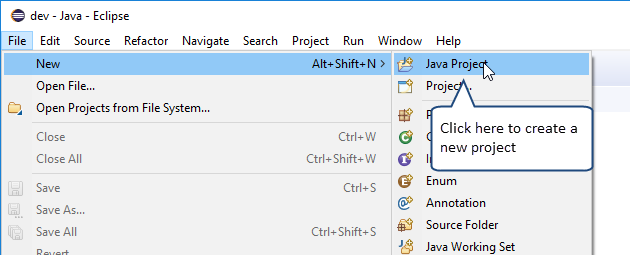
The first step to creating your own extensions is to create a project in Eclipse. From the top menu bar of Eclipse choose: File -> New -> Java Project
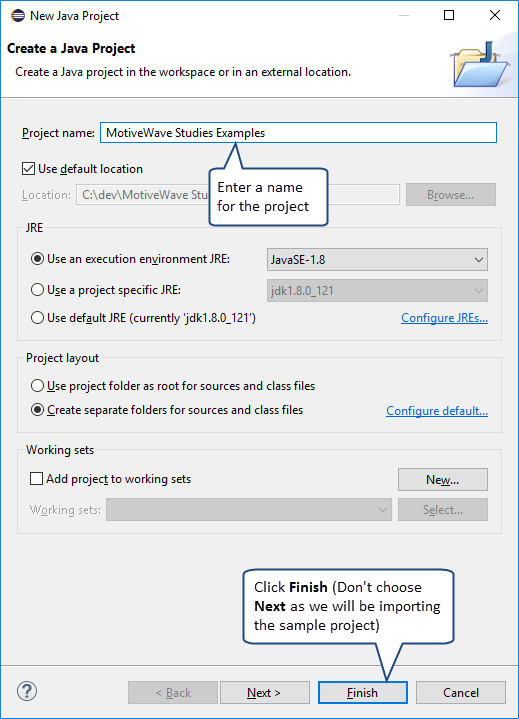
This will launch the New Project Dialog (see below). Enter a name for the project and click the Finish button. In the next step we will be importing the sample project so there is no need to configure anything specific for this project.
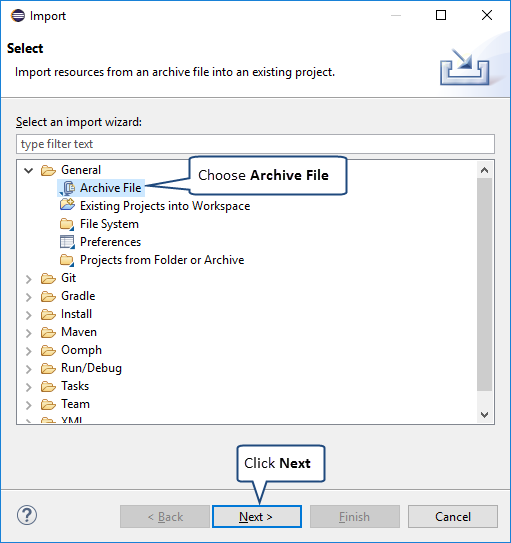
Now that you have created an initial project you can import the sample project files from the zip file ‘MotiveWave Studies.zip’. Right click on the ‘MotiveWave Studies’ project that you just created and choose ‘Import…’ from the menu.

From the Import Dialog, open the ‘General’ folder and choose ‘Archive File’
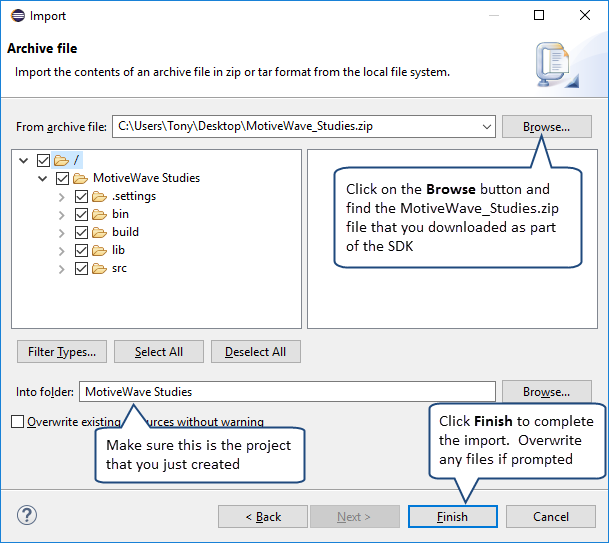
The next step is to specify the archive (.zip) file. In this case it will be ‘MotiveWave Studies.zip’. If you have not done so already, download this sample project from the MotiveWave™ (see: http://www.motivewave.com/support/sdk.htm)
You may be asked to confirm the overwriting of some files like ‘.classpath’. If this happens, press OK to accept the changes.
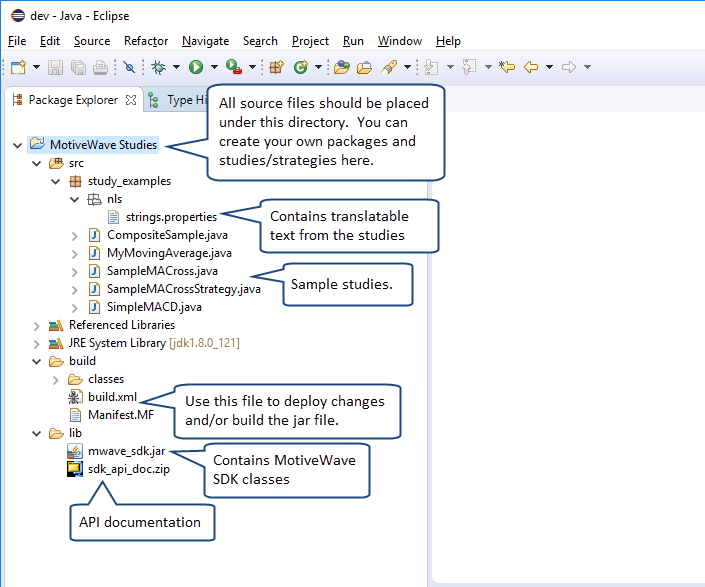
Once the import is complete, the structure of you project should look like the screenshot below.
Now that you have the project created, you can deploy this to MotiveWave™. The ‘build.xml’ file (under the ‘build’ folder can be used to compile your code and copy the files to the ‘MotiveWave Extensions’ directory. Right click on this file and choose ‘Run As -> Ant Build’
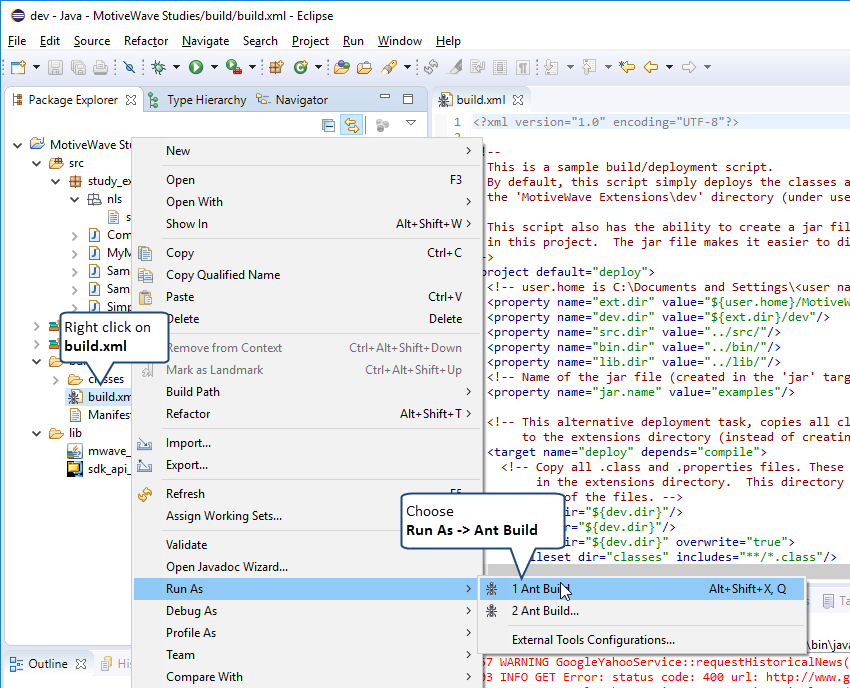
By default this will run the ‘deploy’ target. This task will compile all of the source code under the ‘src’ folder and then copy it to the MotiveWave Extensions directory. Finally, it will modify the ‘.last_updated’ file to signal MotiveWave™ that it should scan for changes and load them.
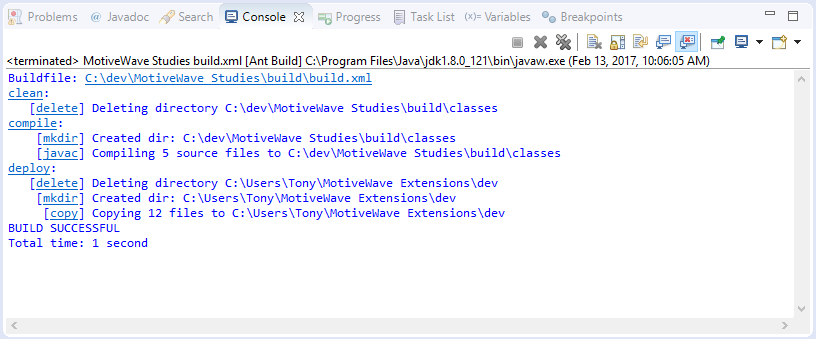
The ‘Console’ tab will show the output from this action. It should look similar to the following screen shot:
Finally, if you have MotiveWave™ running, you should see an extra menu ‘Examples’ under the ‘Study’ menu that contains the three sample studies (see below):

Last updated