Pages
The console layout is highly configurable. All pages can have their layouts modified and pages can be added or removed. The following screen shot illustrates the page area and some of the available options:

Creating a new page
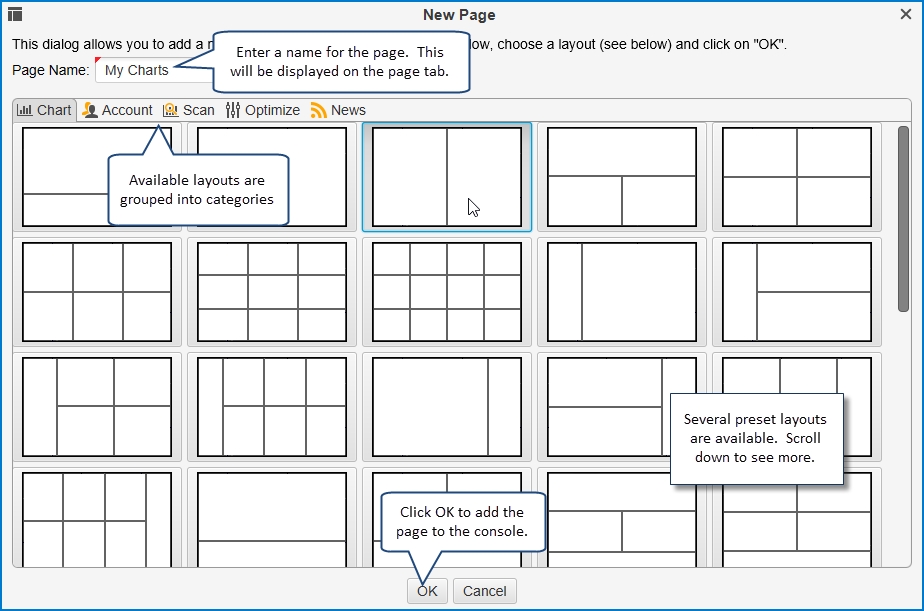
To add a page to the console, click on the New Page button (see above). The New Page dialog will appear (see below). You will need to specify a name for your page. This name is displayed on the page tab when it is added to the console.
There are many different layouts available for your page. Just choose the one that most closely matches what you want to have on the page. Several categories are available in the tabs at the top of the dialog. The icon matching the category will be displayed on the page tab that you are creating (making it easier to identify).
Modifying a Page
You can change the name of a page and optionally its layout. To modify the current page, click on the Edit Page button on the right hand side of the page area.

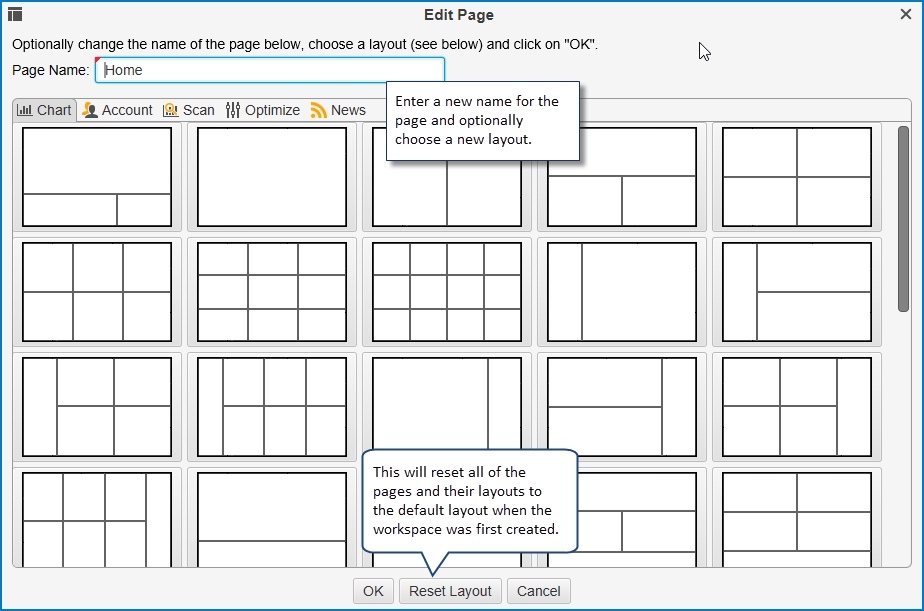
This will open the Edit Page dialog where you can change the name of the page and optionally select a new layout for the page.
At the bottom of the Edit Page dialog you will see a button called Reset Layout. This button can be used to reset the console layout to the default. This will reset all of the pages including their layouts to be the same as when you first created the workspace (see Default Console Layout screen shot).
Changing the Page Order
If you would like to change the order of the pages, simply click and drag the page tab to the desired location:

Resizing Panels
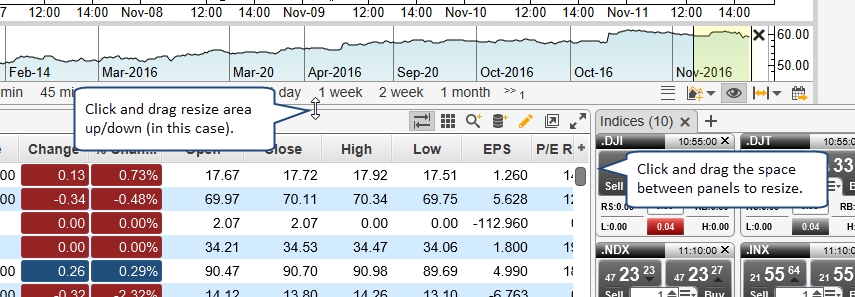
The size of the panels displayed in a page can be resized by clicking and dragging the area between each panel. Notice that the mouse cursor will change when you hover over these areas. The following screen shot illustrates changing the vertical space between the chart area and watch list area in the Home page:
Adding New Panel Tabs
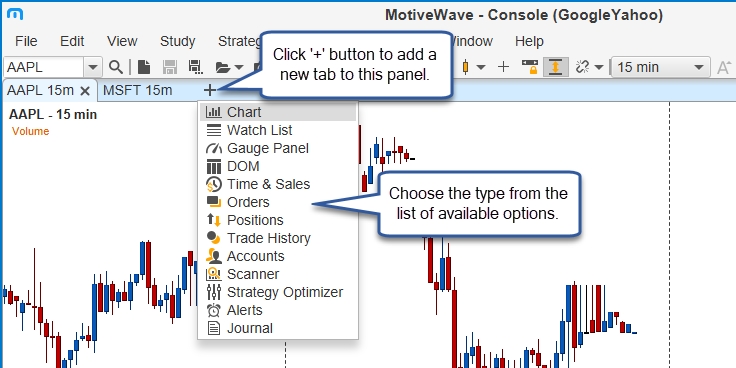
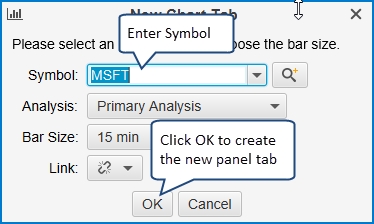
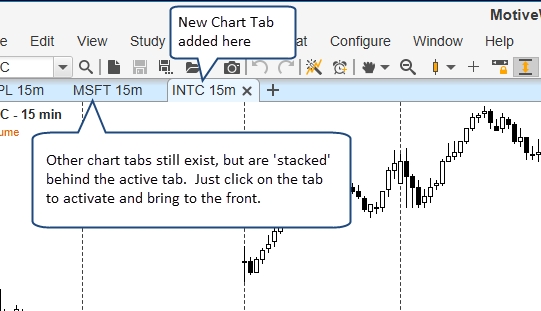
New panel tabs can be added to each panel area in the active page. Simply click on the New Tab button to the right of the existing tabs. The follow screen shots show the sequence to add a new chart to the main panel of the Home page. In this example, three charts are stacked on top of each other with the active chart showing with the highlighted tab (in white).
Creating a Custom Layout
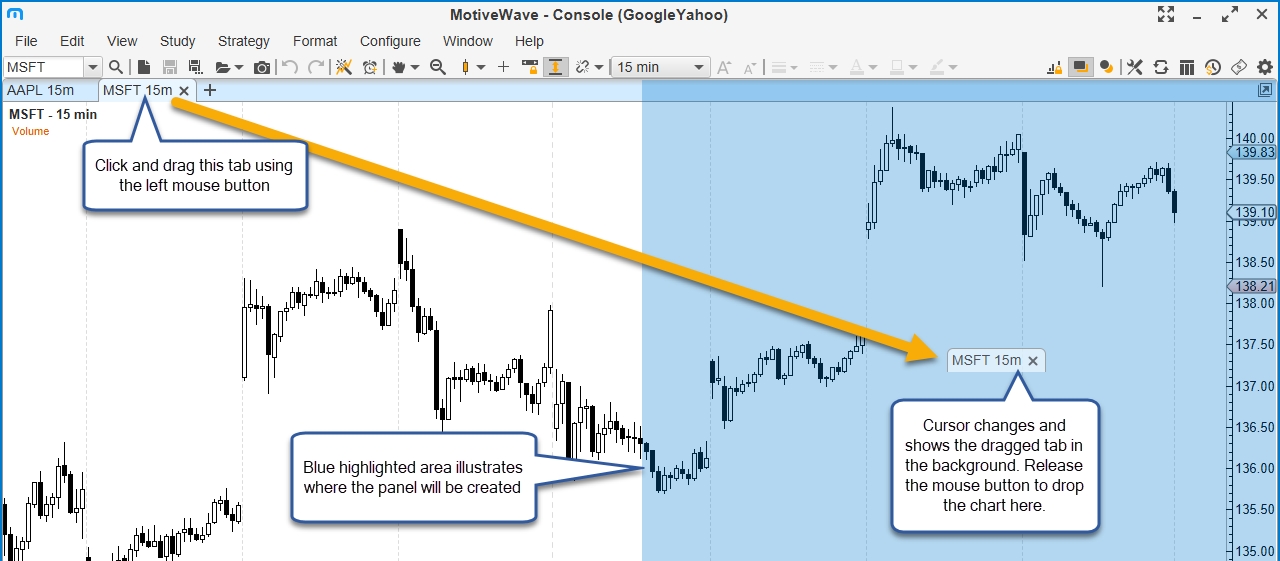
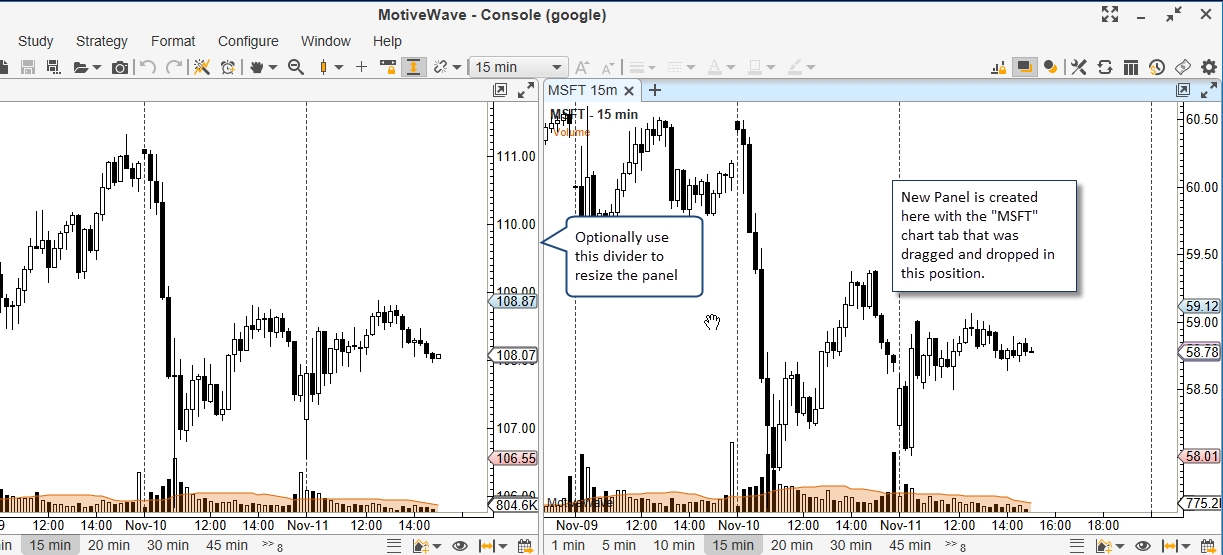
MotiveWave™ includes a number of built-in page layouts which are available when you create or edit the page. You can organize the panels in the page however you like by left clicking and dragging the tabs around. As you drag the tab, you will see a highlighted blue area where the panel will be created when you release the mouse button. This feature provides you the flexibility to create any layout with any number of panels. The following screen shot illustrates moving the chart tab that we created in the previous section (MSFT symbol) and creating a new panel area by horizontally dividing the existing panel into two.
Last updated